Getting Down To Work - Microsoft Word
| Site: | Technology-Enabled Learning Lounge |
| Course: | Basic IT Skills |
| Book: | Getting Down To Work - Microsoft Word |
| Printed by: | Guest user |
| Date: | Saturday, 4 July 2026, 7:20 AM |
Description
Word
Table of contents
- 1. Microsoft Word®
- 1.1. Documents
- 1.2. New Document View
- 1.3. Templates
- 1.4. Template Resume View
- 1.5. Ribbon Bar (Toolbar)
- 1.6. Page Layout
- 1.7. Page Layout View (2)
- 1.8. Home Bar
- 1.9. Home Bar View
- 1.10. Home Bar - Fonts
- 1.11. Home Bar Font Change View
- 1.12. Home Bar - Paragraph
- 1.13. Home Bar - Paragraph View
- 1.14. Home Bar - Styles
- 1.15. Home Bar - Styles View
- 1.16. Home Bar - Find & Replace
- 1.17. Home Bar - Replace View
- 1.18. Insert Bar
- 1.19. Insert Bar View
- 1.20. Insert Bar - Tables
- 1.21. Insert Table View
- 1.22. Insert Bar - Hyperlinks
- 1.23. Insert Hyperlink View
- 1.24. Checking A Hyperlink
- 1.25. Insert Bar - Headers etc.
- 1.26. Headers View
- 1.27. Adding Comments
- 1.28. File Tab
- 1.29. File Tab View
- 1.30. Activity: Quick Review
1. Microsoft Word®
![]() Word processing was one of the first applications developed for computers and is one of the most used applications for personal and office productivity. Originally it was an application developed for the production of print material as a replacement for the typewriter. The advantages of using a word processor over the typewriter is that mistakes can be corrected easily and documents can be saved for future use and edited as needed.
Word processing was one of the first applications developed for computers and is one of the most used applications for personal and office productivity. Originally it was an application developed for the production of print material as a replacement for the typewriter. The advantages of using a word processor over the typewriter is that mistakes can be corrected easily and documents can be saved for future use and edited as needed.
Microsoft Word® is a word processing tool. Documents can be basic printed text or fully formatted versions with tables of contents, page numbers, headers and footers, charts, tables and images. In addition, batch mailing of form letters is possible, and notes and comments can be inserted. The software can automatically check and correct spelling and grammar errors.
Il peut même traduire des sections de texte. It can even translate sections of text using installed dictionaries or a built-in link to the Web. Newer versions of Word® are only slightly different than earlier versions. The reference in this section will be to Word 2013®.
Note: It will not be possible to learn all of the functionality of a progam like Word® (or Excel® or PowerPoint®) in just a few hours. The intention is merely to introduce you to these office tools. The more time you spend browsing around in the programs, hovering your mouse over different sections to see what they do and creating practice documents, the more thoroughly you will learn the powerful built-in features of these tools.
1.1. Documents
When you open Word® from the icon in your start menu, it will display a list of your recently created or edited documents and a choice to open a new blank document or use a template.
Blank documents open with some standard page formatting in place to set margins, type style and paragraph and line spacing. All of these features can be adjusted at any time.
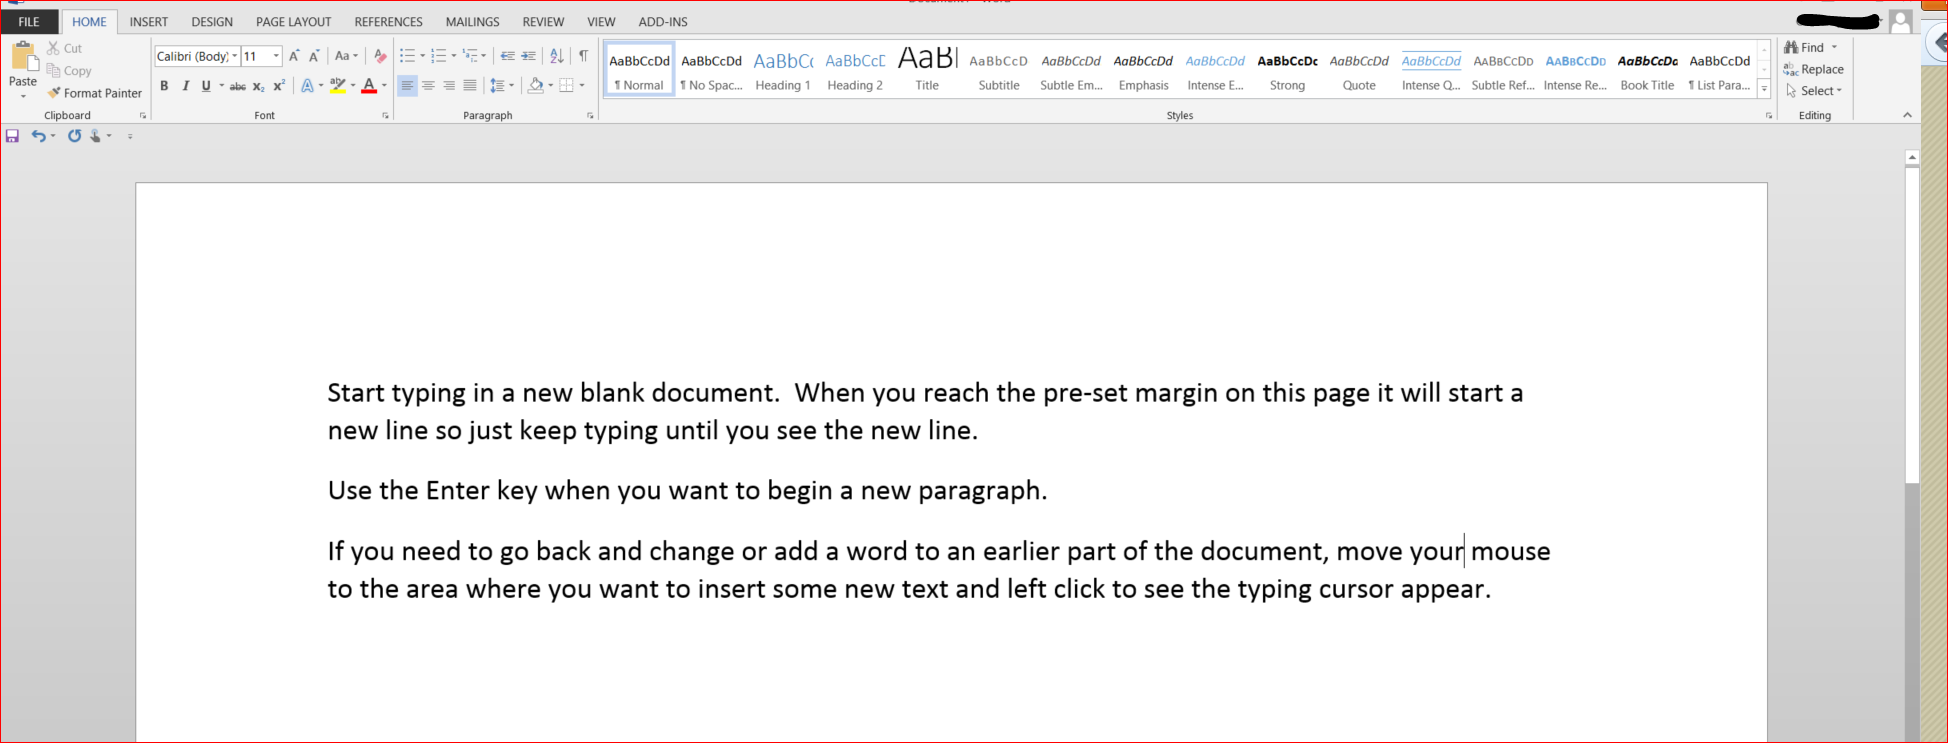
You can just begin typing in a blank document to see how it will look. The document will automatically start a new line for you when it reaches the margin stop.
Use the Enter key to start a new paragraph.
If you need to go back and add a word or sentence to an earlier section of your document, move your mouse to the area where you want to insert some new text and left click to see the typing cursor appear.
1.2. New Document View
1.3. Templates
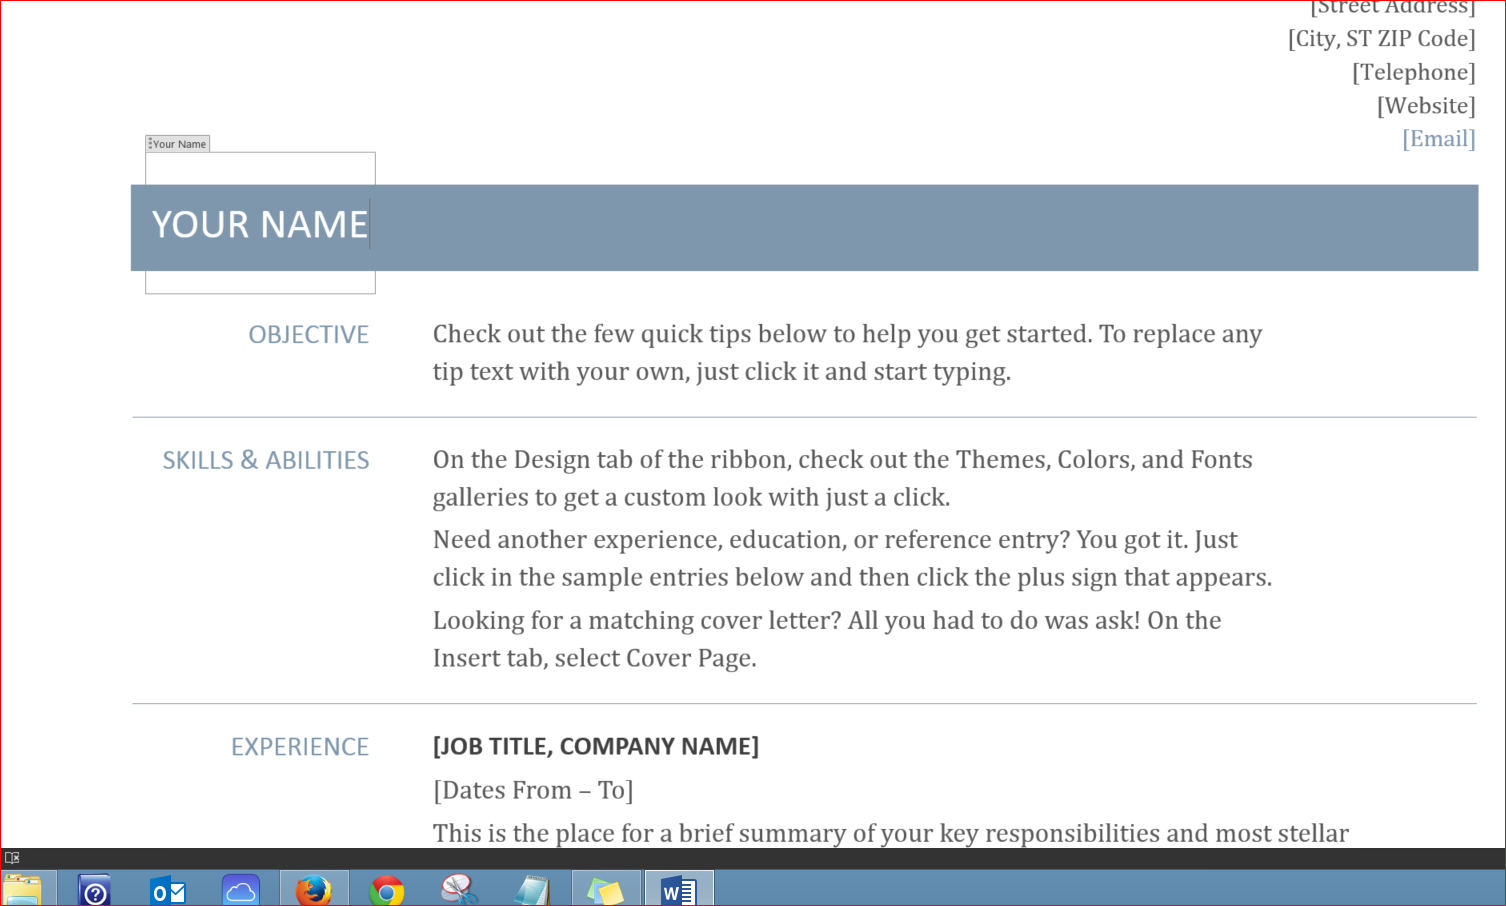
Word® includes a large selection of templates of common business documents and social documents such as invitations, flyers and raffle tickets. The complex formatting of these documents is done for you. These templates also add some design features such as headings and colour blocks to make documents look attractive. They can be modified to suit your needs or you can just replace the text with your own words.
1.4. Template Resume View
1.5. Ribbon Bar (Toolbar)
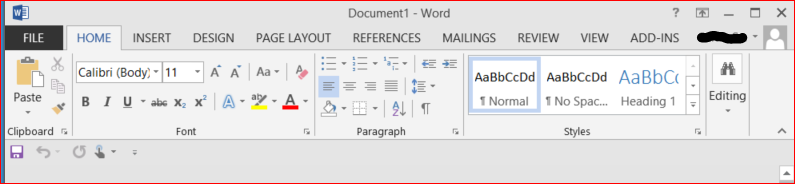
The bars at the top of a Word® document window are where you will find all the options to customize the document. The top-most line contains the section headings: File; Home; Insert; Design; Page Layout; References; Mailings; Review; View; Add-Ins. Clicking on each of these words will open a series of options related to your document.

We will review a few of the most-used features.
1.6. Page Layout
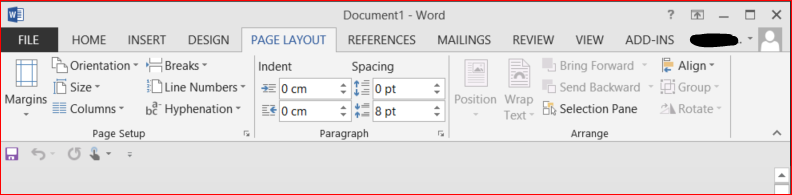
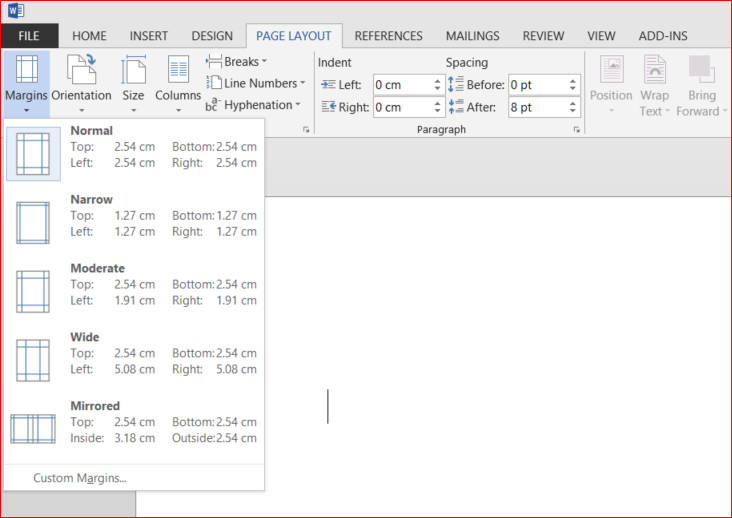
The Page Layout bar shows you how your document is currently set up. It shows the margins for the page, the spacing of the paragraphs and whether the text on the page displays in Portrait or Landscape format. All of these features can be adjusted.
1.7. Page Layout View (2)
1.8. Home Bar
The Home bar is usually the area you use the most while you are typing your content. A few of the features you will find in this area are:
- Fonts
- Bullets
- Styles
- Spacing
- Find and replace
- Select and edit
- Copy, paste and undo
1.9. Home Bar View
1.10. Home Bar - Fonts
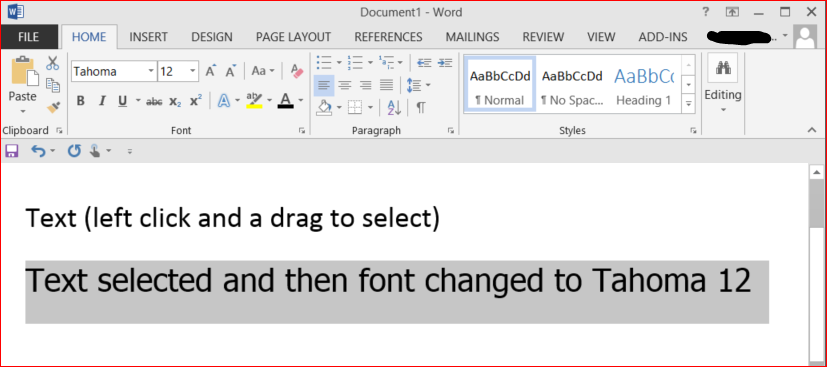
The font is the typestyle of the words you are typing. There are hundreds of fonts to choose from and a large variety of type sizes to choose.
Most papers and letters are written in a font that is simple to read and in a font size between 9 and 12 points.
You can see what a font or font size will look like by selecting a section of your text (hold down the left mouse key and scroll over the section of text) and then choosing different options from the lists in the bar above.
You can also change the colour of your text, highlight sections of your text, or make words appear in bold font, in italics or underlined. Select the text first and then choose your option.
1.11. Home Bar Font Change View
1.12. Home Bar - Paragraph
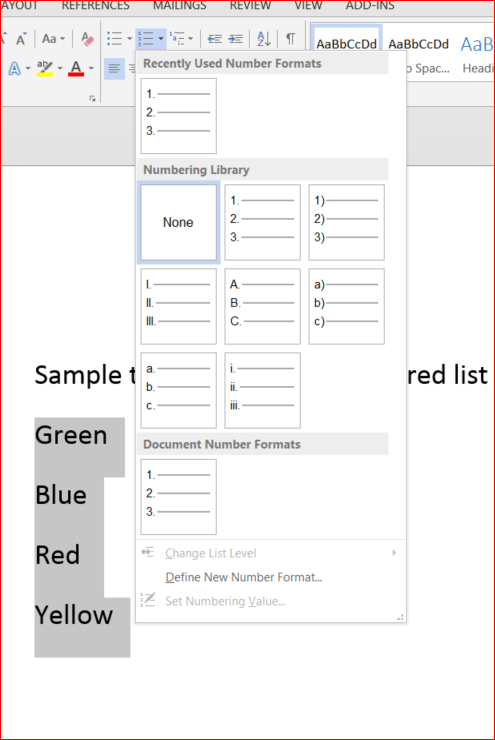
Next to the Font area on the Home bar is the Paragraph area. Here you can select sections of your text and make bulleted or numbered lists.
You can move your text or portions of your text to various areas of the page. By selecting a section of text and then choosing one of these options, you can see what it can do.
To undo any change you have just made, choose Control and Z on your keyboard or locate the “undo” icon on the left of your page just underneath the toolbar.
![]()
1.13. Home Bar - Paragraph View
1.14. Home Bar - Styles
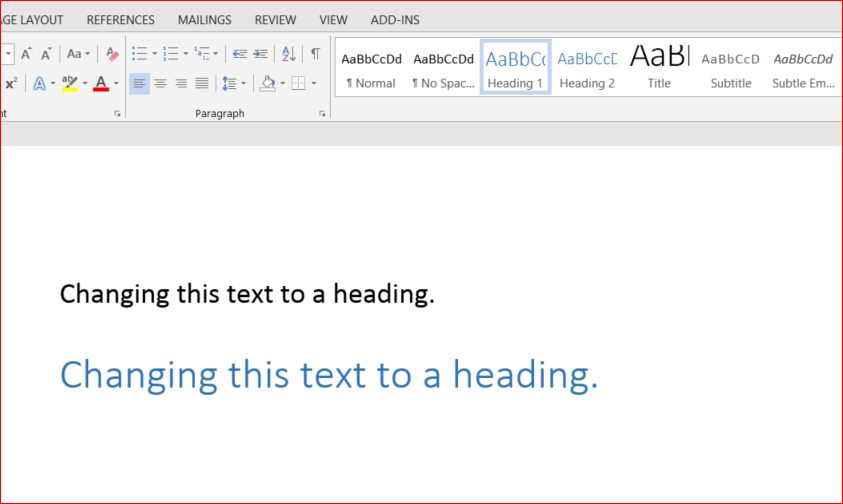
To the right of the Paragraph area is the Styles section. You can make portions of your text into titles or subtitles using these keys. You can also apply various text styles to improve the look of your document. Click to highlight the text you wish to change, then point your cursor the the desired style in the bar above. Hit the Enter key to confirm your choice.
1.15. Home Bar - Styles View
1.16. Home Bar - Find & Replace
The Find and Replace icons are found at the far end of the Home bar in the Editing section.
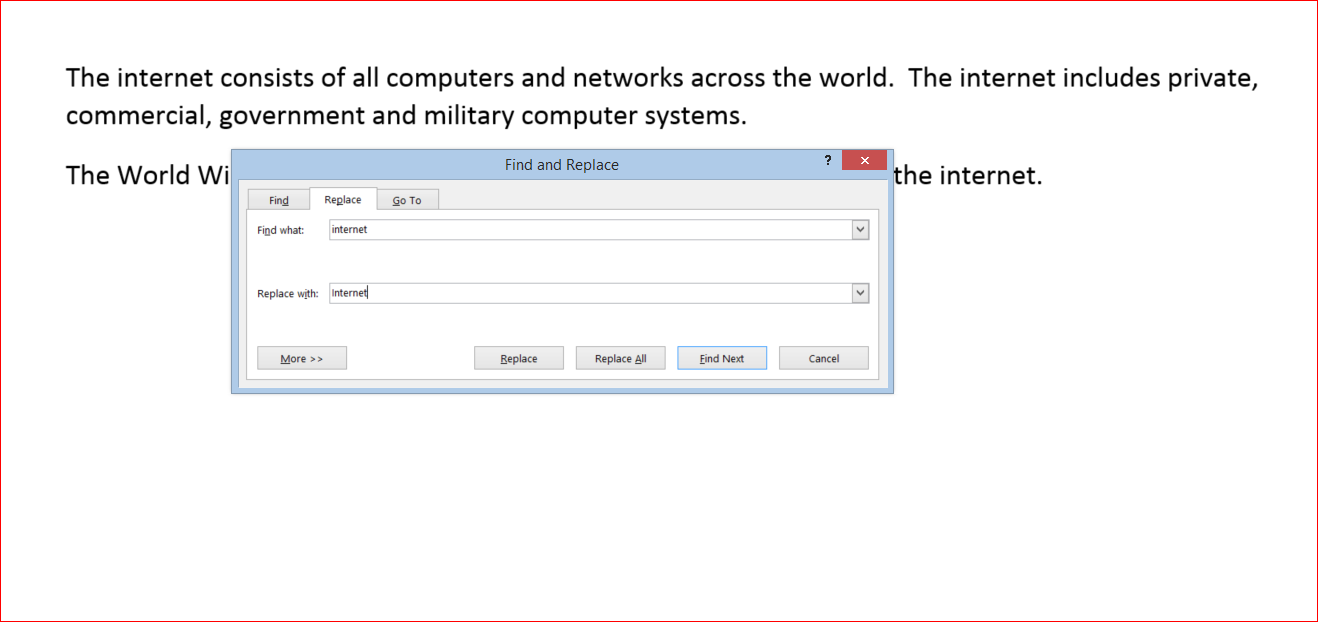
These are helpful tools when you are writing long documents and discover that you have misused or misspelled a word many times. For example, you may have forgotten that the word “Internet” should be spelled with a capital “I”. In this case, you would select the Replace icon and type the word “internet” into the "Find what" box. Then, choose the "Replace with" box and type in the correct spelling of the word “Internet”. Word® will automatically correct each instance and confirm how many changes were made.
1.17. Home Bar - Replace View
1.18. Insert Bar
Another important section of the ribbon at the top of your document is the Insert tab. This area allows you to add features to take your document beyond just text.
A few of the features you will find in this area are the ability to add:
- Tables
- Pictures, Images, Symbols
- Media
- Hyperlinks
- Comments
- Headers and Footers
1.19. Insert Bar View

1.20. Insert Bar - Tables
You may wish to add information that will be easiest to understand if it is sorted into rows and columns.
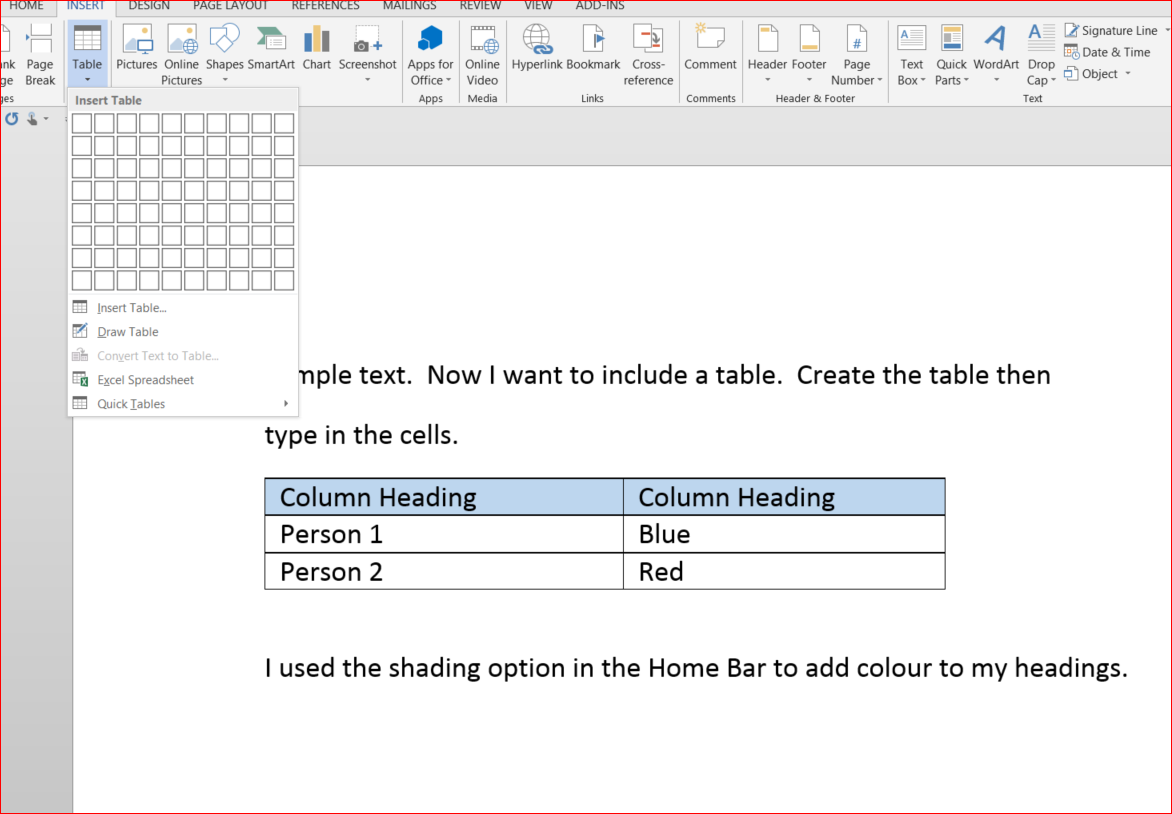
To insert a table, first make sure your cursor is at the place in the document that you would like to add the table. Then, click on the Table icon and using your mouse, select the number of rows and columns you think you will need (you can change it later if you need to). Click the mouse again and the table will be added to your document.
If you want to delete the table, hover over the table and right click your mouse. The option to delete the table is at the bottom of the list of options.
In this same list of right-click options, you will see the ability to insert columns or rows. You can also make changes to individual cells of the table and other table formatting changes.
To see the full list of formatting options available for tables, click on the table in your document and look at the top of the document in the Insert tab. You will see a new area called Table Tools. Click in here to make more changes.
Within the table in your document, place your mouse cursor wherever you want to type. To resize the columns, hold your mouse on the column border until you see the arrows appear and then move your mouse to adjust the column.
1.21. Insert Table View
1.22. Insert Bar - Hyperlinks
In the Insert bar, you can add hyperlinks directly to your document.
Once you know the address you wish to insert (you may have copied and pasted it from your browser as we discussed in Unit 2), choose the spot in your document where you would like to add the link and then go to the Insert bar at the top of the page.
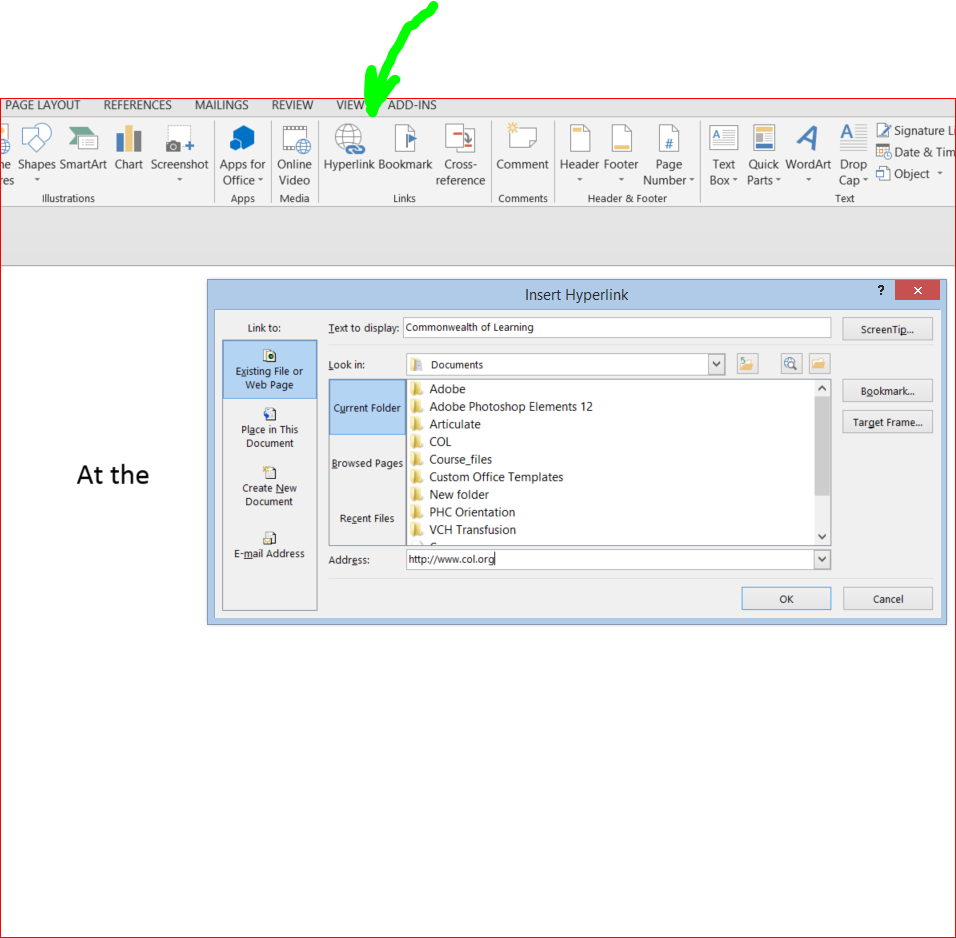
Near the middle part of the ribbon you will see an icon and the word “Hyperlink”. Click on “Hyperlink" and a box will open up.
Toward the bottom of the box is a section entitled “address” – paste or type the url (Web address) in here.
At the top of the box is area called “text to be displayed”. If you leave this empty, then the actual url will appear in your text. If you prefer to make some other text link to this address you would type it in here.
For example, leaving the “text to be displayed” box blank, will cause the hyperlink to look like this: www.col.org
If you type in some text in the “text to be displayed” box, you can have a link to the same page that looks like this: Commonwealth of Learning.
Click OK and the link will appear underlined and in blue font in your document.
1.23. Insert Hyperlink View
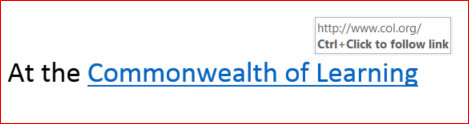
1.24. Checking A Hyperlink
When you are still editing the Word® document, you cannot just click on this new hyperlink.
If you want to check that it opens correctly (and you are connected to the Internet), hover over the link with your mouse and then follow the instructions to hold down the Control button on your keyboard while you left click with your mouse.
Your linked Web page should open in a new window.
You can correct, change or remove the hyperlink by selecting the hyperlinked text and then clicking on the hyperlink icon again at the top of the page.
1.25. Insert Bar - Headers etc.
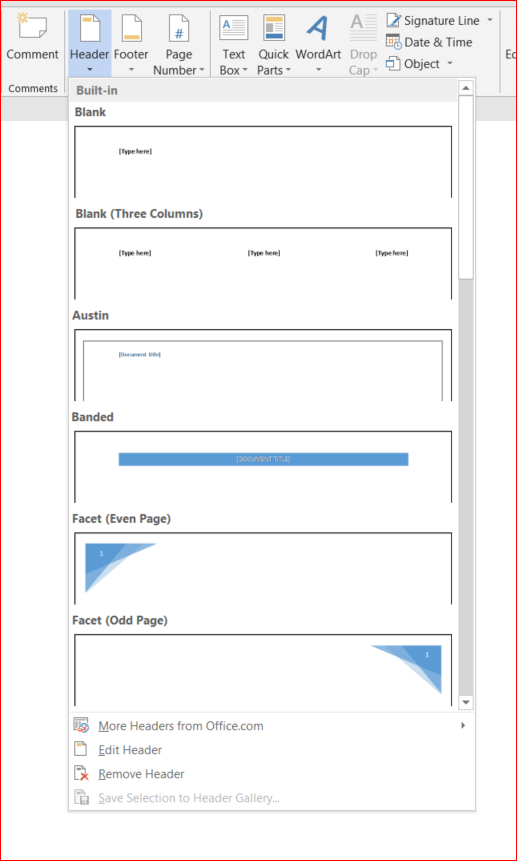
When you are creating documents of more than one page, you will often want to have a header or footer with information such as the title of the document, a page number or date. You will find these options on the Insert bar.
Choose the type of header or footer you want and Word will automatically format it in your document. A special "Header & Footer Tools" design section will open in the toolbar. Then you can add text.
You need to select the "Close Header or Footer" button in this toolbar in order to get back to the main part of your document.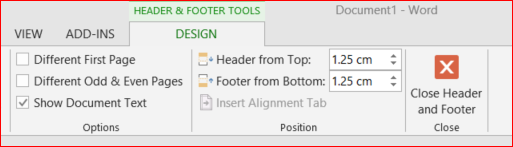
1.26. Headers View
1.27. Adding Comments
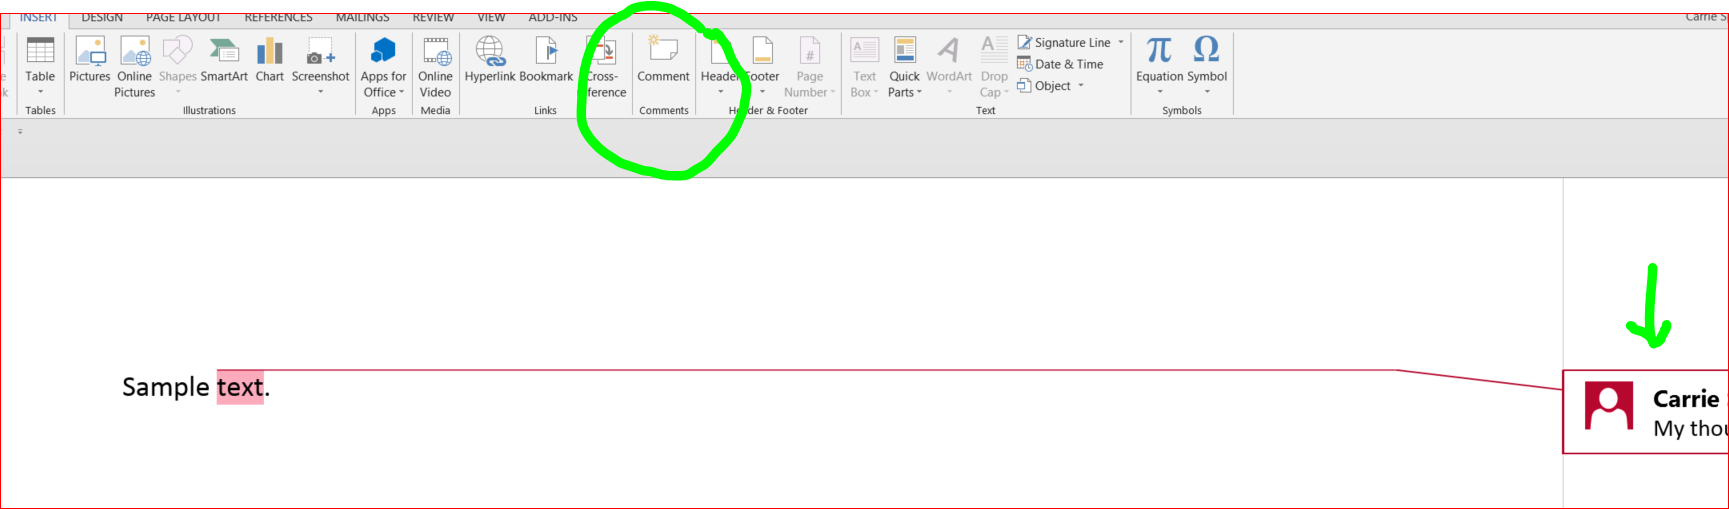
If you have been asked to review a document, the Comment feature is a handy way to provide your comments without changing the layout or content of the document.
Put your cursor next to the section of text you wish to comment upon.
Next, click on the Comment icon (located in the Insert tab to the left of the Hyperlink section), and a column will open to the right of the document with your login name and the date already included.
You can type your comments here.
To remove a comment, right click on the comment and choose Delete from the menu.
When you save the document again, your comments will remain for others to see.
1.28. File Tab
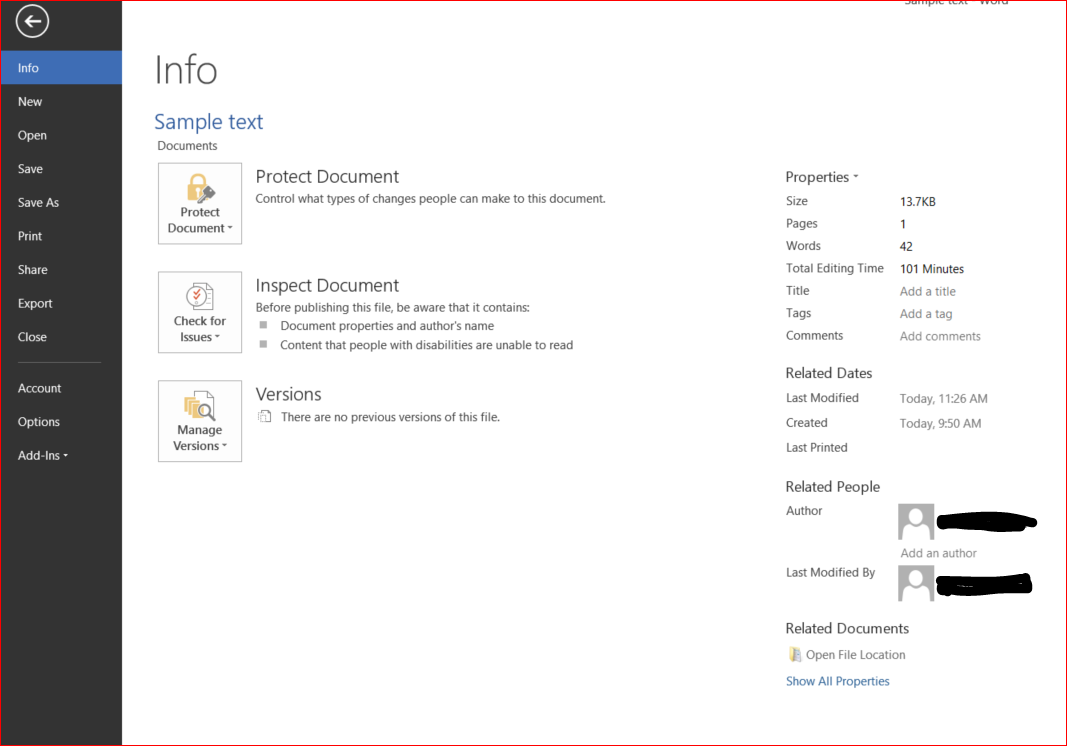
The File tab is at the far left of the Word® toolbar (also called a ribbon). When you click on it, it opens a little differently with a column displaying on the left rather than across the top. In later versions of Word® your document is replaced with a screen that provides you with a number of options to check your document in preparation for saving or sending.
To save your document, choose Save in the left column if you are saving an updated version of a document you have saved before. If this is the first time you have saved the document or if you want to keep the older document as well as this updated version, choose Save As and you will be given options of what to name your document and where to save it.
If you wish to open a document you created earlier, choose Open in the File tab and you will see a list of the documents stored on this computer. There is also an option to open files that are stored in SkyDrive (a Windows® cloud service). Cloud services are discussed later in this course.
In older versions of Word® (Word 97-2003) there are sometimes problems with compatibility with newer version of the program. There are compatibility packs available for free online for anyone still using these versions. In most cases this is now only a problem if someone wants to change the formatting. Viewing the documents and making text edits to documents created in newer versions of Word® is not a problem. Word 2013®, Word 2010® and Office Word 2007 all use a file extension .docx whereas older versions of Word use .doc
1.29. File Tab View
1.30. Activity: Quick Review
 In this section of the course, you have learned to:
- Create and save a basic Word® document.
To test your knowledge, try to complete this activity:
- Open a blank document.
- Type your full name. Bold and underline your last name.
- Save your document, call it "Name" and put it into your Test folder created earlier in the course. (If you don't have the Test folder, save it directly to your Documents folder).
- Close Word®. Search and find your saved document.
Can you answer these questions?
- In which toolbar would you locate the "create hyperlink" option?
- Where in the Home bar is the option to create a bulleted list?