Getting Down To Work - Microsoft PowerPoint
| Site: | Technology-Enabled Learning Lounge |
| Course: | Basic IT Skills |
| Book: | Getting Down To Work - Microsoft PowerPoint |
| Printed by: | Guest user |
| Date: | Thursday, 25 June 2026, 2:46 AM |
Description
PowerPoint
Table of contents
- 1. PowerPoint®
- 1.1. Opening
- 1.2. Opening Screen View
- 1.3. Blank Presentation
- 1.4. Blank Presentation View
- 1.5. Home Bar
- 1.6. New Slide View
- 1.7. Change Layout
- 1.8. Slide Options Menu
- 1.9. Text Changes
- 1.10. Text Changes View
- 1.11. Insert Bar
- 1.12. Adding an Image
- 1.13. Image from Computer View
- 1.14. Editing an Image
- 1.15. Compress Image View
- 1.16. Resize Image
- 1.17. Resize Image View
- 1.18. Inserting Media
- 1.19. Inserting Video
- 1.20. Upload Video View
- 1.21. Video Player
- 1.22. Video Inserted View
- 1.23. Video Size
- 1.24. Video Properties View
- 1.25. Transitions & Animations
- 1.26. Animations View
- 1.27. Speaker Notes
- 1.28. Speaker Notes View
- 1.29. Print Notes or Presentation
- 1.30. Print View
- 1.31. Save Powerpoint® File
- 1.32. Save View
- 1.33. Giving the Presentation
- 1.34. Quick Review Activity
1. PowerPoint®
 PowerPoint® is a tool for creating effective presentations. It is designed as a slideshow with one screen following after the other. Screens can contain text, images and media. Special effects can be added.
There are hundreds of books, webpages and videos dedicated to describing or demonstrating the most effective and least effective PowerPoint® presentations. Most designers agree that good presentations are uncluttered, interesting and brief.
This section will introduce the basic functions of the PowerPoint® software.
1.1. Opening
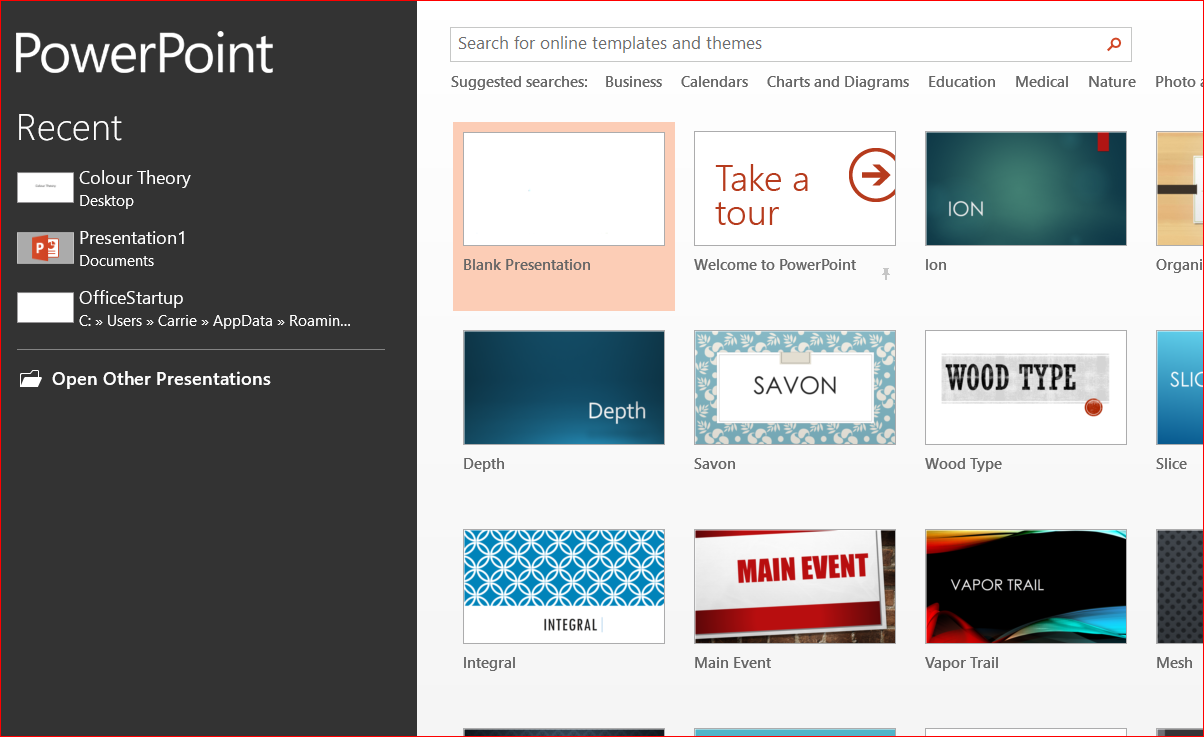
When you open the PowerPoint® program, you are presented with options to choose a Blank Presentation or from a series of template and themes. Themes have pre-set background colours, fonts and special effects to save you time. Some organizations have their own customized themes or may require that presentations have a certain font size or colour. You can customize the Blank Presentation to these requirements.
We will work with the Blank Presentation.
This first screen also opens with a list of your recent presentations in the column to the left.
1.2. Opening Screen View
1.3. Blank Presentation
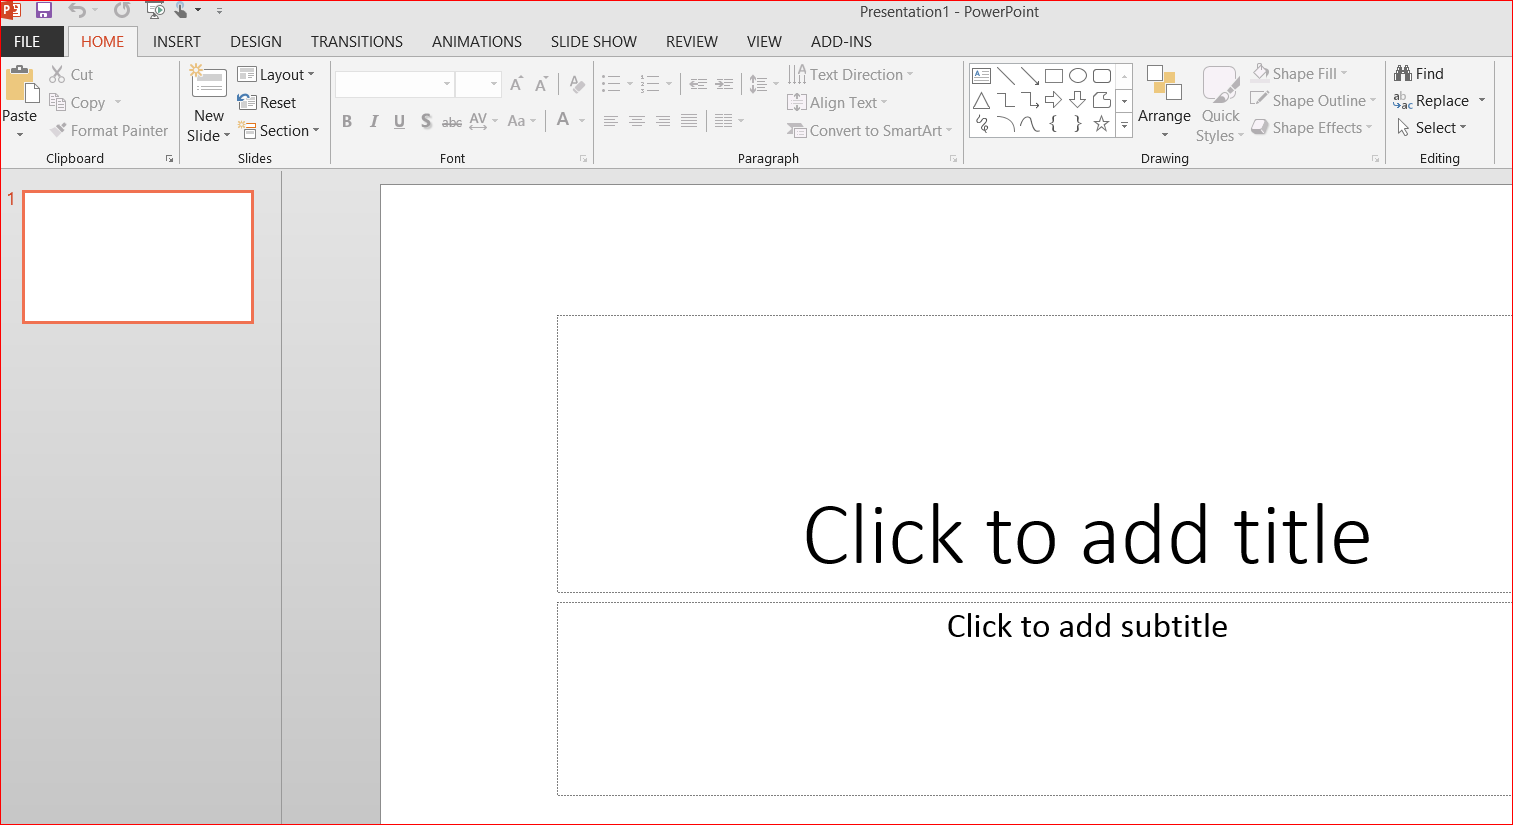
When you open the Blank Presentation, the first slide - a title slide - is already created for you and ready for you to add text. The column on the left of the screen will show all of the slides in your presentation.
The tool bar at the top looks similar to your Microsoft Word® and Excel® screens with a series of Tabs:
![]()
1.4. Blank Presentation View
1.5. Home Bar
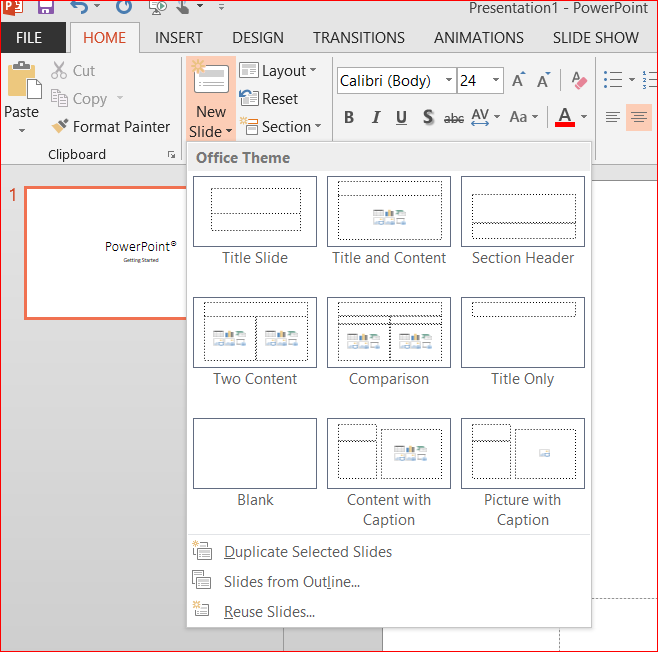
The Home Bar contains your text editing functions. It is also where you find the option to create a new slide.
When you click on the New Slide section, it opens to a selection of possible slide options. Your choice of option depends on how you want to display your content and whether you want to add mostly text, mostly images or a combination of text, images or media to the new slide.
1.6. New Slide View
1.7. Change Layout
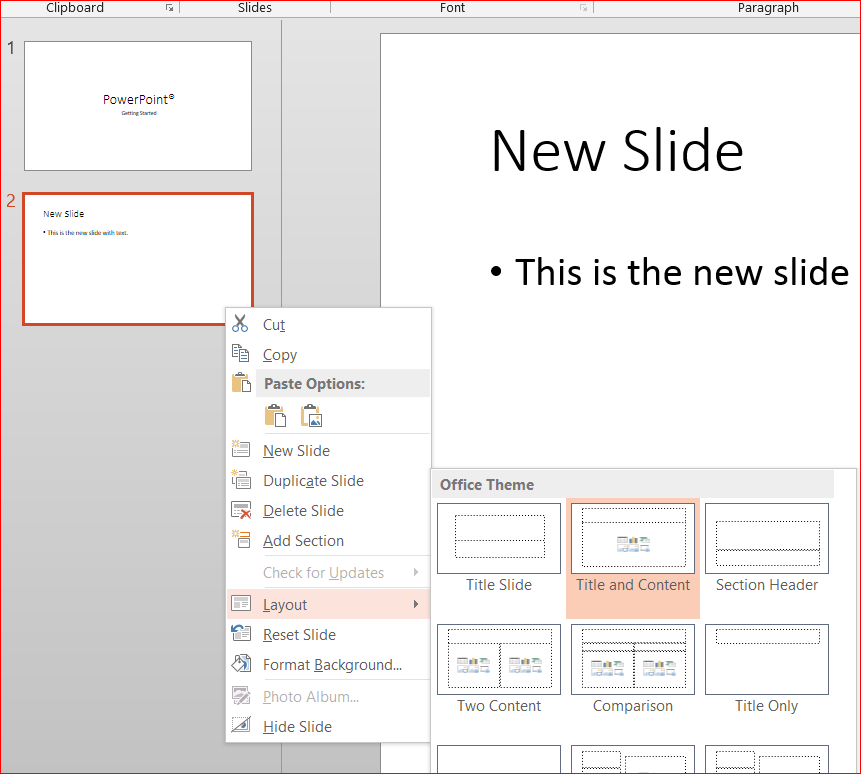
If you select a slide layout and don't like the result, you can manually change the slide layout after you have created the slide. Right-click on the slide in the left column and choose Layout.
The menu you see when you right-click on the slide also contains options to duplicate or delete the slide.
It is also possible to create a new slide from this menu as well as from the Toolbar.
1.8. Slide Options Menu
1.9. Text Changes
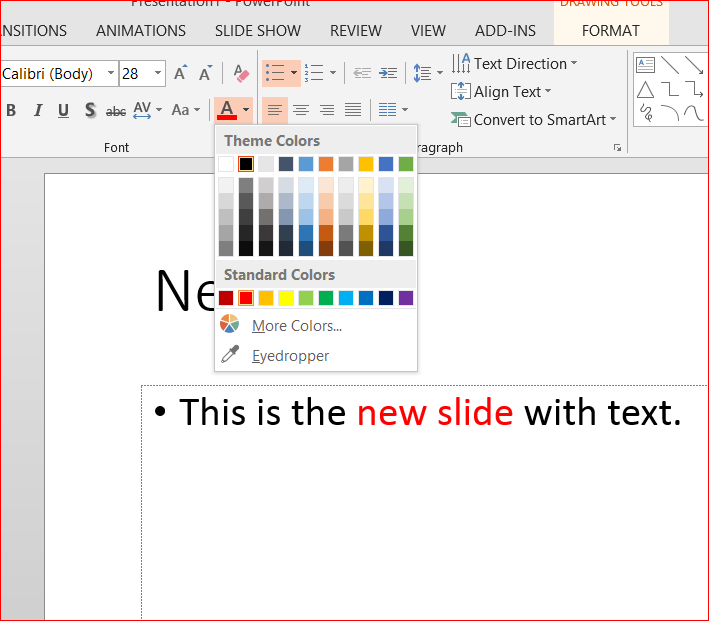
When you place your cursor on text in the large window on your current slide, the Home toolbar will activate the areas that permit changes to the font and paragraph area.
These features work the same way they do in Word®. Select the text you wish to modify and then choose the new font, colour or spacing option from the toolbar.
Remember you are intending this presentation to be viewed on a screen perhaps in a large room. Font sizes should be no smaller than 24 point and ideally larger.
1.10. Text Changes View
1.11. Insert Bar
This bar allows you to add images, tables, media, shapes and other actions. You can go here to add a picture to your slide.
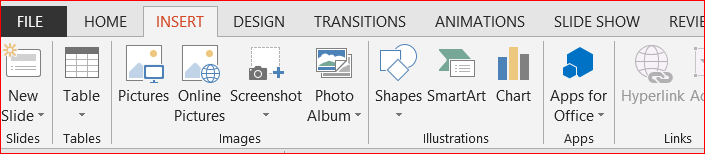
Shortcuts: On any slide layout that is designed to allow content, you will see six greyed-out icons in the centre of the window. You can hover over each one to see what it does.
If you want to add a picture, look for the icon that has a mountain and the sun.
There are two versions: one to help you upload pictures you already have on your computer and one that helps you upload pictures you have saved on the Web.
1.12. Adding an Image
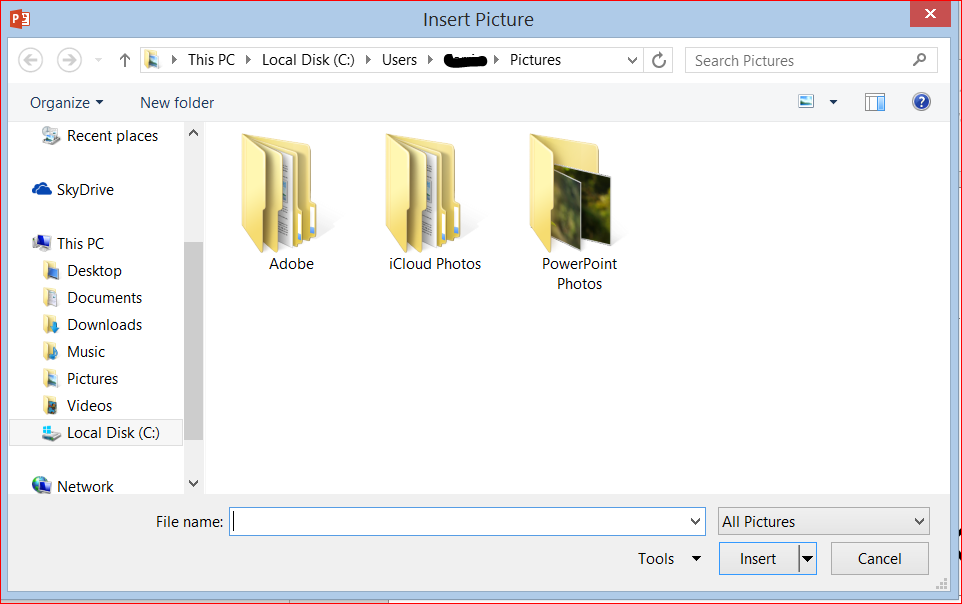
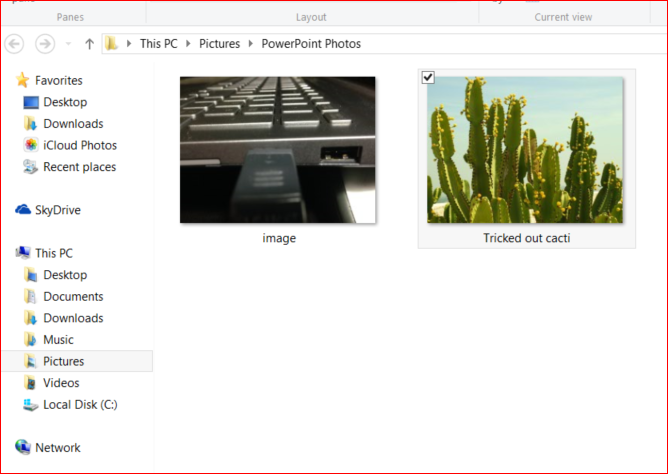
When you choose the Pictures option from the Insert bar, a window will open and you will need to browse to where your picture is located. You will need to click on any folders to open them and find your picture. When you find the image you want, click on it to select it and then click on the Insert button at the bottom of the window.
1.13. Image from Computer View
1.14. Editing an Image
Now that you are working with a picture, you will see that an additional tab is open in the Toolbar.
This is the Picture Tools Format screen that will give you many other options to customise your photo.
Note that there is an option to Compress Pictures in this Toolbar. This is helpful to keep your presentation size manageable. If Powerpoint® presentations get too large, they can be difficult to share and slow to open.

1.15. Compress Image View

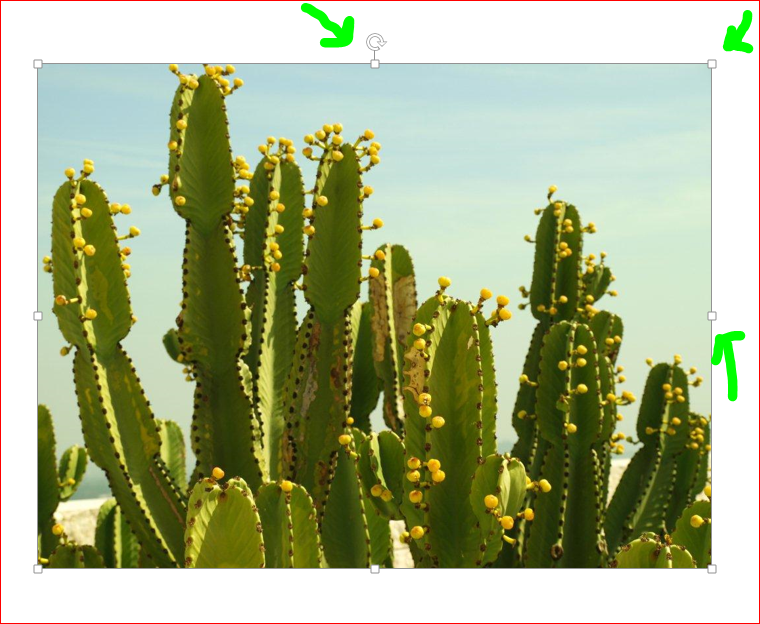
1.16. Resize Image
Once your picture has been added to the slide, you can move its position, resize it or rotate it by clicking on the image and then clicking on the various resizing boxes and dragging the photo. This is similar to resizing a window on your computer.
1.17. Resize Image View
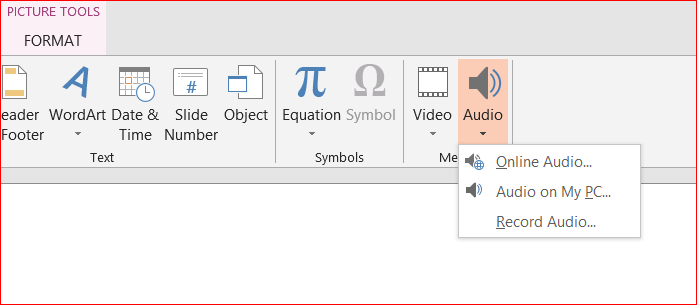
1.18. Inserting Media
At the far end of the Insert Bar, you will see options to add Video or Audio to your presentation. There is even an option to record your own voice directly on to the PowerPoint® slide.
1.19. Inserting Video
Uploading a video is similar to uploading a picture. Choose Video from the Insert Bar menu and choose to look for a video on your computer or online. Select the video by clicking on it and then click on the Insert button at the bottom of the window.
1.20. Upload Video View

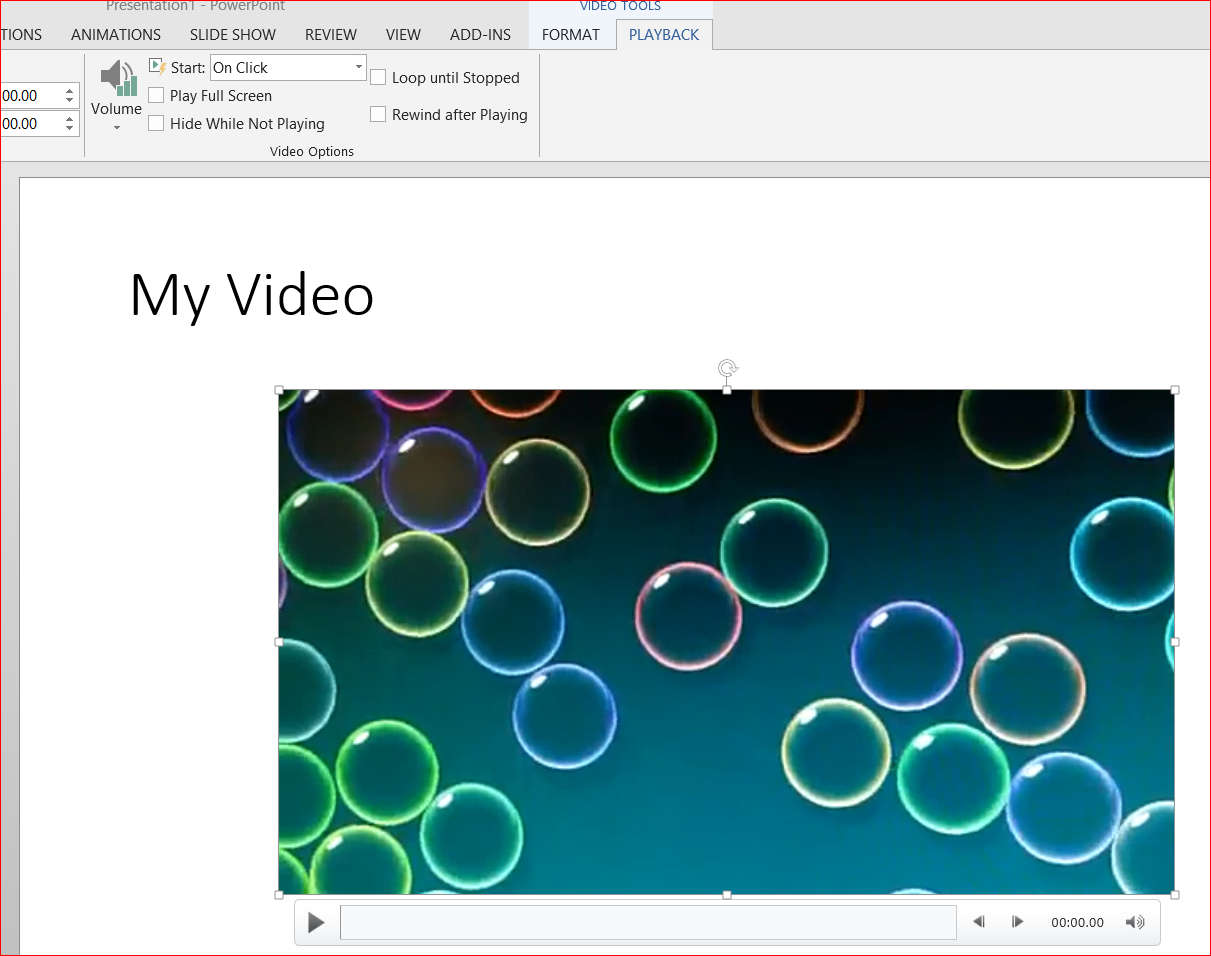
1.21. Video Player
The video will appear in your slide with a video player at the bottom.
The toolbar will now include a Video Tools section where you can make further adjustments.
In this section you can determine whether the video plays automatically or whether the presenter must press the play button to start the video.
1.22. Video Inserted View
1.23. Video Size
Most modern video recording and editing programs will allow you to compress your video. Even short videos can be large in size if they are not compressed.
Adding large videos to your presentation can slow it down and sometimes they will fail to load and play properly on other computers.
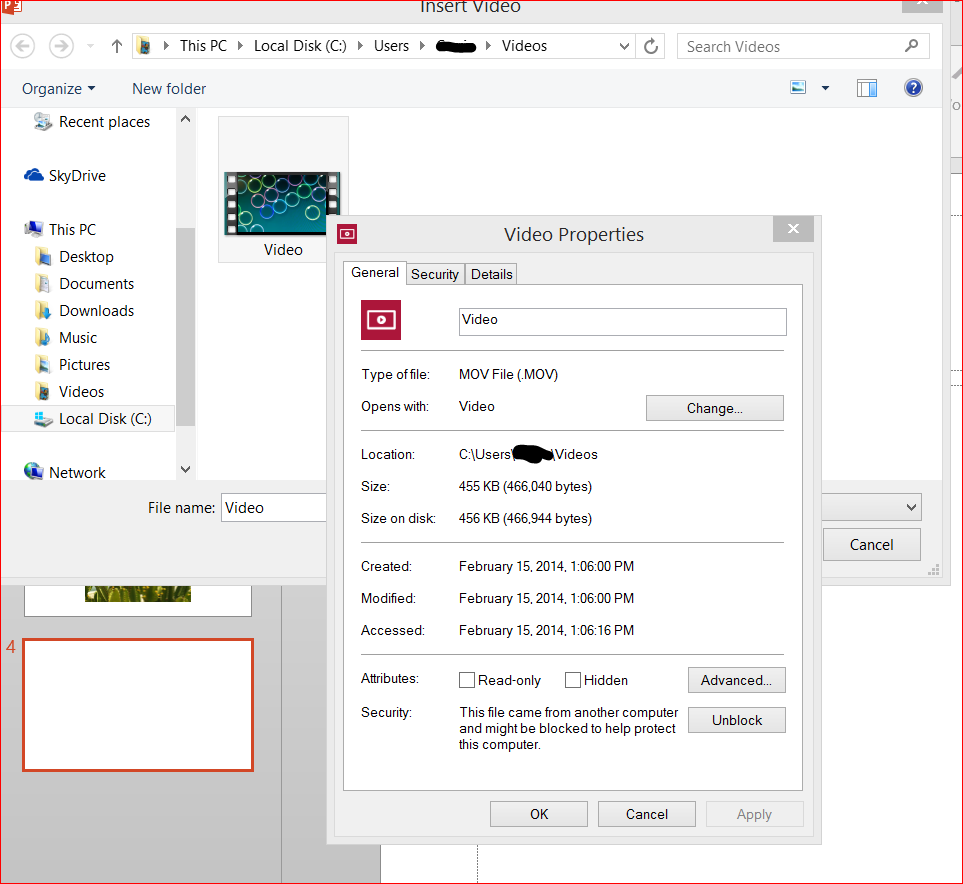
You can check the size of video before you select it, by right-clicking on the video and choosing Properties from the menu.
In the example that follows, the ten second video has been compressed and is very small - 455KB - but most videos will be longer and therefore larger.
Keeping in mind that pictures and audio also add to the size of your Powerpoint® presentation, you can see that it is challenging to include a lot of video directly in the presentation.
To get around this, it is possible to link to larger videos by inserting a hyperlink to a video that is playing on a sharing site such as YouTube. (Make sure you have copyright permission to make this link).
If you know you will be connected to high-speed Internet during a presentation, you can embed the video into your PowerPoint® and it will stream directly from the website server.
1.24. Video Properties View
1.25. Transitions & Animations
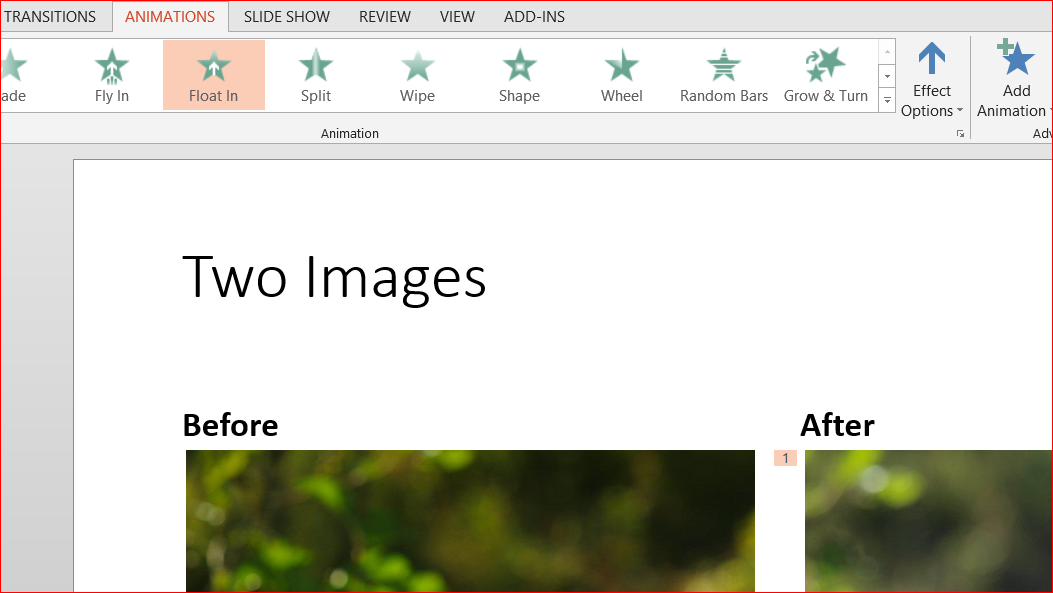
In the Transitions Tab of the Toolbar, you have options to control how your slides move from one slide to the next during your presentation. If you click on the different options, your slides will do a quick demo of the transition so you can see if you like it.

In the Animations Tab of the Toolbar, you have options to control sections of an individual slide. For example if you had two images on a slide (perhaps a before and after example). You might want to start with only the first image showing and then have the second comparison image come in after. Choose one of the Animation effects and set the timing in the Animation Toolbar. Similar to transitions, you are able to adjust the timing of the effect.
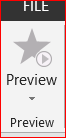
You can test your result by selecting the Preview Tab at the far left of the Animations toolbar.
1.26. Animations View
1.27. Speaker Notes
If you have made a simple and visually interesting PowerPoint® presentation, you may wish to have some speaking notes.
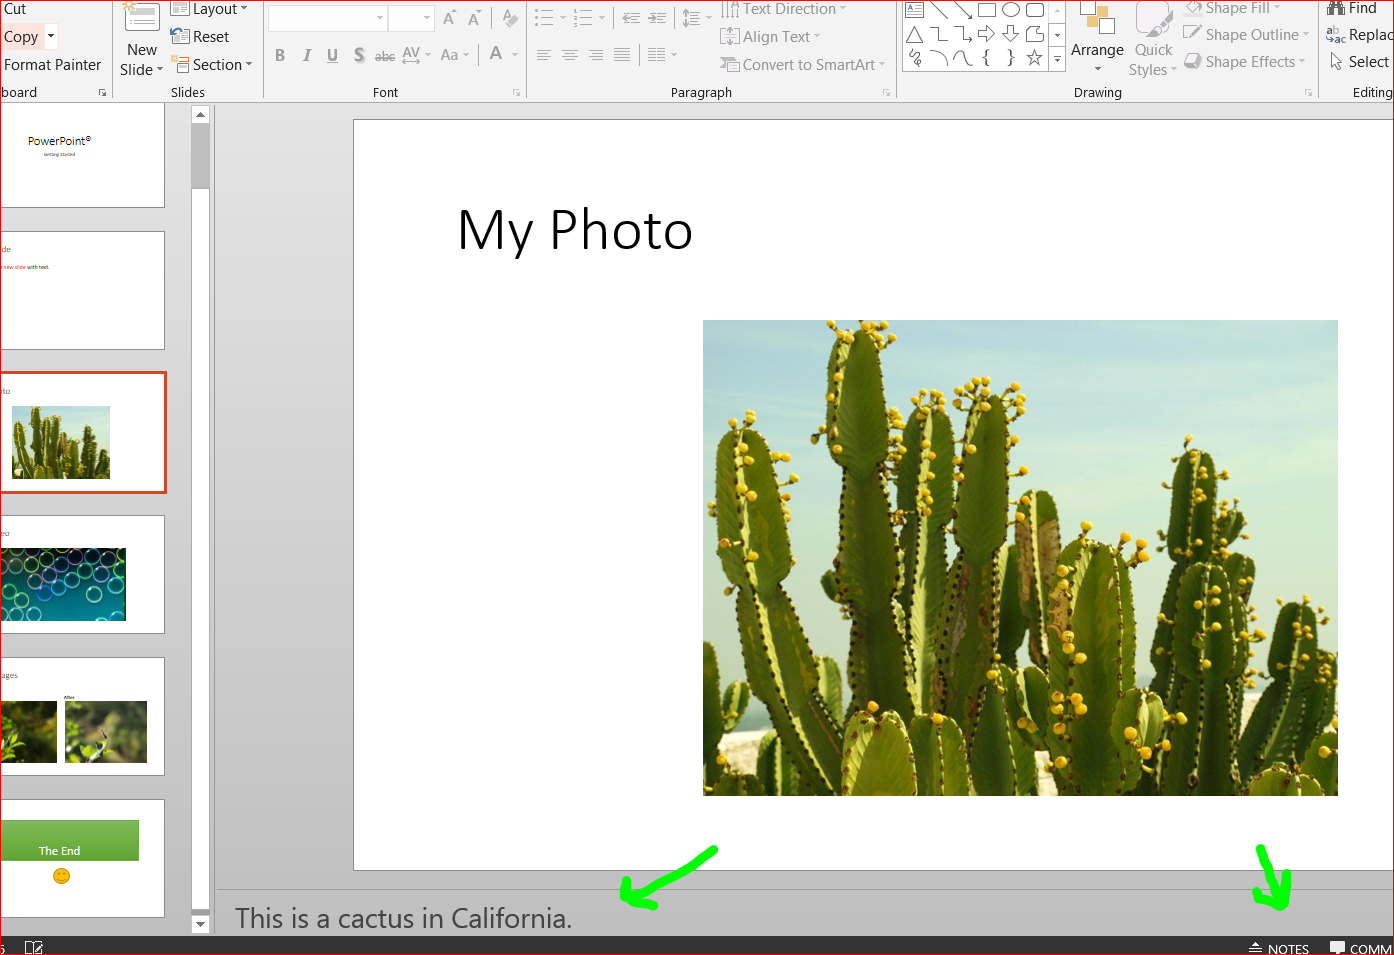
You can type notes on each slide and then print them out separately with small versions of the slides next to them.
To enable speaker notes, you may need to click on the tiny Notes icon at the very bottom of the PowerPoint® screen.
Type in the text box below your slide that says "Click to add notes".
1.28. Speaker Notes View
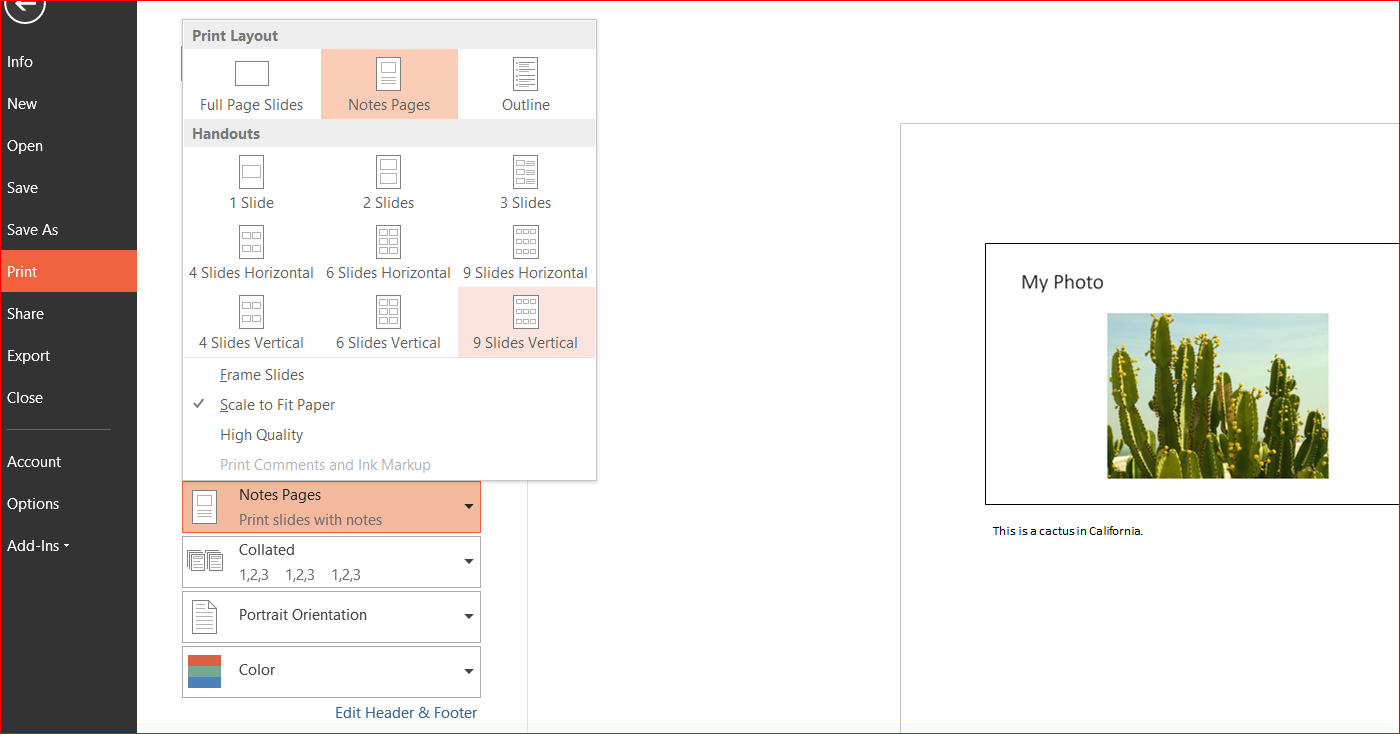
1.29. Print Notes or Presentation
Print options are in the File Tab of the top Toolbar.
You must be connected to a printer (either plugged in or wireless) in order to print your notes.
If you wish to go paperless, you can go to Slide Show options in the Slide Show bar and check the box in front of Use Presenter View. This will allow you to see the speaker notes on your laptop and a preview of the next slide. Your audience will only see the slide show on the presentation monitor.
1.30. Print View
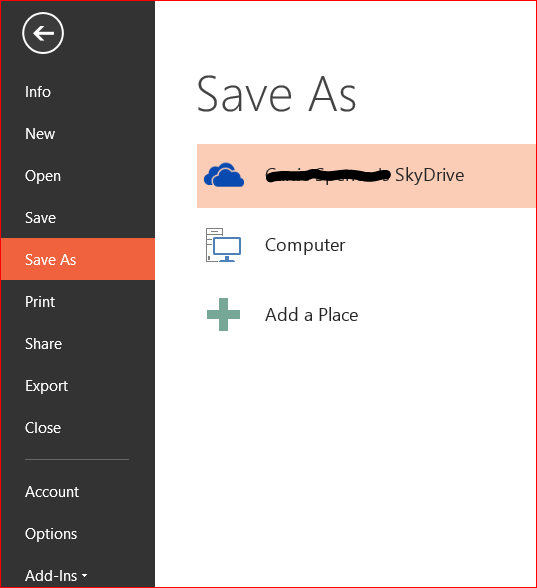
1.31. Save Powerpoint® File
Open the File Tab and click Save or Save As.
In the File Name box, type a name for your presentation and then click Save.
If you are working on a large presentation, it is a good idea to save it after each time you add something new.
1.32. Save View
1.33. Giving the Presentation
Go to the Slide Show tab in the top Toolbar. This bar gives you options to:
- start your presentation from different slides.
- set up the presentation to be viewed online.
- set up the presentation so that you can see your speaker notes but the audience cannot.

To get out of the Slide Show view and back to the editing view, press Esc on your keyboard.
1.34. Quick Review Activity
In this section of the course, you have learned to:
- Create and save a basic PowerPoint® presentation.
To test your knowledge, try to complete this activity:
- Open a blank presentation.
- To the first slide, add your first name as the title and your surname as the subtitle.
- Create a second slide in a Title and Content layout.
- Add your first name as the title and your birthdate as the content.
- Add a colourful theme to your slides.
- Close PowerPoint®. Because this is an activity, you do not need to save the presentation file.
Can you answer these questions?
- What does a transition do?
- Where on the toolbar do you find the option to add a video?